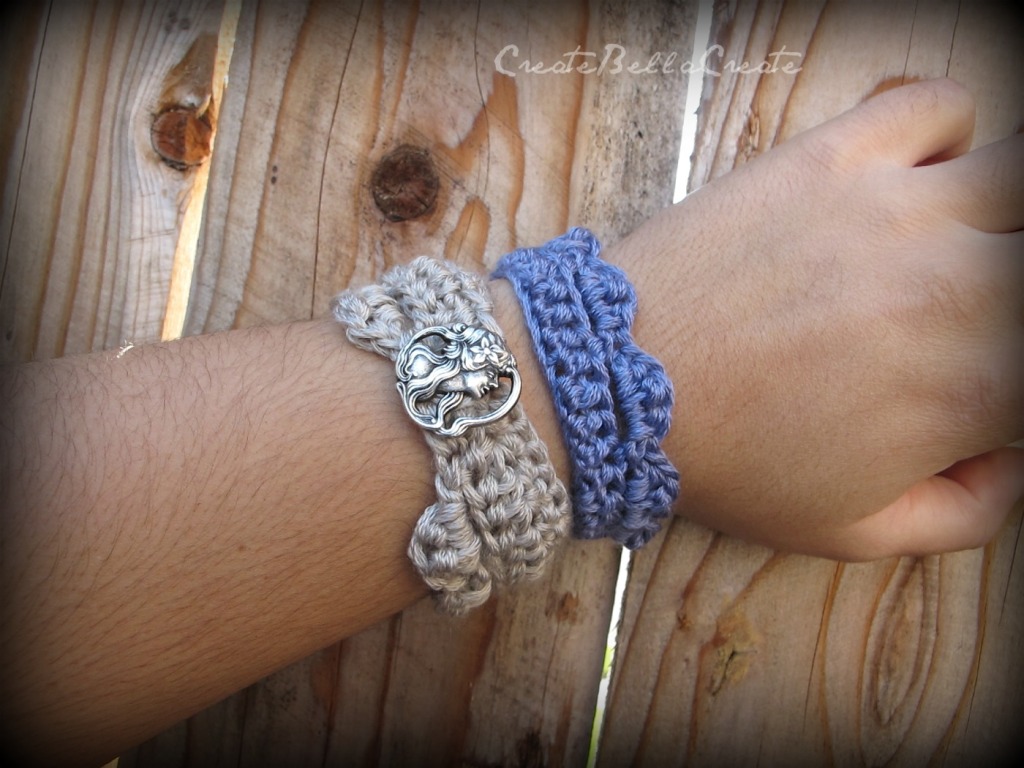
I love crocheting, taking a ball of yarn and turning it into something beautiful and unique never gets old for me. I have had to take a little break from big crocheting pieces for medical reasons ...which for someone who loves crocheting is extremely frustrating. So to make up for the time off I am taking I am trying to do small pieces like bracelets, headbands, belts...that sort of thing here and there. Although my favorite things to crochet are shirts and dresses for my daughter. :)
I did this simple pattern this weekend while most people I knew were out braving the crowds shopping. I am sure there are ones similar to this out there, its a pretty basic pattern that can be completed in well under an hour.
You may sell things made from my personal patterns BUT DO NOT sell my patterns as your own work. If you sell something made from one of my patterns please credit me for the pattern, Thanks in advance!! :)
You may sell things made from my personal patterns BUT DO NOT sell my patterns as your own work. If you sell something made from one of my patterns please credit me for the pattern, Thanks in advance!! :)
For this pattern you will need:
3.75 mm hook
Yarn: I used scraps left over from projects
Naturally Caron Spa looks great with this or if you are going for a more natural feel organic cotton yarn also looks awesome but you will need to up your hook accordingly.
A button
Needle and thread and a yarn needle
Stitches Used:
Chain {ch}
Single Crochet {sc}
Half Double Crochet {hdc}
Double Crochet {dc}
Skip {sk}
Space {sp}
Simple Crochet Bracelet Pattern written in US Crochet Terms
ch 35 +2 more
Row 1: hdc in the 2nd ch from your hook
hdc across
If you are making the bracelet that is thinner {its the blue one in the photo above then you will skip Row 2 and go onto Row 3}
Row 2: Ch 2{does not count}
Turn
hdc in the ch 2 sp
hdc across
Row 3: ch 1 {does not count}
Turn
sc in the ch 1 sp
*ch 4, sk 3, sc in the next* repeat this across and stop when there are two stitches left. You will have 8 ch 4 spaces. We are leaving the last two stitches so there is a nice spot for you to sew your button on later on.
Row 4: ch 1 {does not count}
Turn
sc into the 1st ch 4 sp
hdc, dc, hdc, sc into the same ch 4 sp
*sc, hdc, dc, hdc, sc* repeat this pattern in each ch 4 sp
After you do that final sc in the last ch 4 sp you will make your loop to go over your button.
ch 4 or however big or small you need it for your button. For the blue one I used a bigger button so I did a ch 5 but for the tan I had a smaller button so I did a ch 4. You will just have to use your best judgement with your button in hand.
After you do your ch 4 for your loop you will do a slip stitch into the bottom corner where you did your beginning chains. See photo below so you can see what the loop looks like attached. Also before you finish off your yarn and weave in your end....make sure your button can go through the loop. You don't want it too easy or too hard. Somewhere in the middle is the best. :)
Sew on a button on the opposite end from your loop and finish off all your ends and weave in with a yarn needle.
I like to wear both of them together...I think it looks kinda cool and fun. I am also thinking about making one that has a little bigger of a band too and maybe a different shell type stitch around the bottom.
Pattern is for personal use only.
I am going to post a few more of my personal patterns that I have up for free on Ravelry in the coming weeks. If you have a Ravelry account you can view my stuff here:
These would make cute holiday or birthday gifts ...since they work up so quick you could make a bunch of them. My daughter put in a request for four for xmas ...all in different colors so she could wear them all at once and look like she has a rainbow on her arm. :)
If you make one, I would love to see the finished product. You can put a link to it in the comments section. :)
Here are some links to people who have made these bracelets and blogged about it!
{If you make them and blog about it please let me know so I can share the link on this post! :) }
Dawn at Crochet Therapy
http://crochet-therapy.blogspot.co.uk/2012/06/quick-cuffs.html
Here are some links to people who have made these bracelets and blogged about it!
{If you make them and blog about it please let me know so I can share the link on this post! :) }
Dawn at Crochet Therapy
http://crochet-therapy.blogspot.co.uk/2012/06/quick-cuffs.html


Hello :) Just wanted to let you know I featured these on my blog http://dishinwithrebelle.com/?p=146
ReplyDeleteThank you for featuring my pattern on your blog and for letting me know! :)
DeleteThis comment has been removed by the author.
DeleteHi there, I just featured your pattern on my blog - I love these bracelets! http://crochet-therapy.blogspot.co.uk/2012/06/quick-cuffs.html
ReplyDeleteThank you for sharing the pattern :).
So happy to hear! :D I loved seeing your pieces that you worked up from my pattern. :)
Delete